In the intricate world of greenhouse cultivation, mastering environmental control is paramount to cultivating healthy, thriving plants. Among the critical factors, humidity stands out as a silent sculptor of plant well-being, directly influencing everything from growth rates to disease susceptibility. Yet, achieving optimal humidity levels hinges entirely on one foundational element: accurate data. Without precise information on your greenhouse’s humidity, your efforts to adjust ventilation, irrigation, or heating could be misdirected, leading to suboptimal conditions and potential crop loss. This article delves into the crucial art and science of strategic sensor placement, ensuring your humidity monitoring system provides reliable, actionable insights for superior greenhouse management.
Why Accurate Humidity Data Matters in Your Greenhouse
Humidity, specifically relative humidity (RH), plays a pivotal role in the physiological processes of plants. It directly impacts transpiration, the process by which plants release water vapor through their leaves. If humidity is too low, plants transpire excessively, leading to stress, wilting, and nutrient uptake issues. Conversely, if humidity is too high, transpiration slows down significantly, hindering nutrient delivery and creating an ideal breeding ground for devastating fungal diseases like powdery mildew, botrytis, and damping-off.
Understanding and managing Vapor Pressure Deficit (VPD) is also crucial, and it relies heavily on accurate humidity readings alongside temperature. VPD quantifies the drying power of the air, telling you how quickly plants are likely to transpire. Maintaining the correct VPD for your specific crops at different growth stages ensures optimal nutrient uptake, robust growth, and prevents environmental stress. Inaccurate humidity data means inaccurate VPD calculations, rendering your environmental control efforts ineffective and potentially detrimental to your crop’s health and yield.
Understanding Humidity Sensors: Types and Limitations
Before strategically placing your sensors, it’s helpful to understand the basic mechanisms and inherent limitations of common humidity measurement devices. Most greenhouse humidity sensors are either capacitive or resistive. Capacitive sensors measure changes in an electrical field caused by water absorption, offering good accuracy and stability. Resistive sensors, on the other hand, measure changes in electrical resistance as humidity levels fluctuate. Both types are generally reliable but are susceptible to environmental factors that can compromise their readings.
Common limitations include:
- Sensitivity to Contaminants: Dust, pesticides, nutrient solutions, and even natural plant exudates can build up on the sensor’s surface, fouling it and leading to inaccurate readings.
- Temperature Dependence: Relative humidity is inherently linked to temperature. Rapid temperature fluctuations or direct exposure to heat sources can cause erroneous RH readings if the sensor isn’t compensated correctly or if its internal temperature differs significantly from the ambient air it’s measuring.
- Water Exposure: Direct water droplets (from irrigation, condensation, or misting) can temporarily saturate the sensor, causing spikes or prolonged inaccuracies until it dries out.
- Aging and Drift: Over time, all sensors can experience drift, meaning their accuracy diminishes. Regular calibration is essential to maintain data integrity.
Recognizing these limitations underscores the importance of not just where you place sensors, but also how you protect and maintain them.
Key Principles of Strategic Sensor Placement
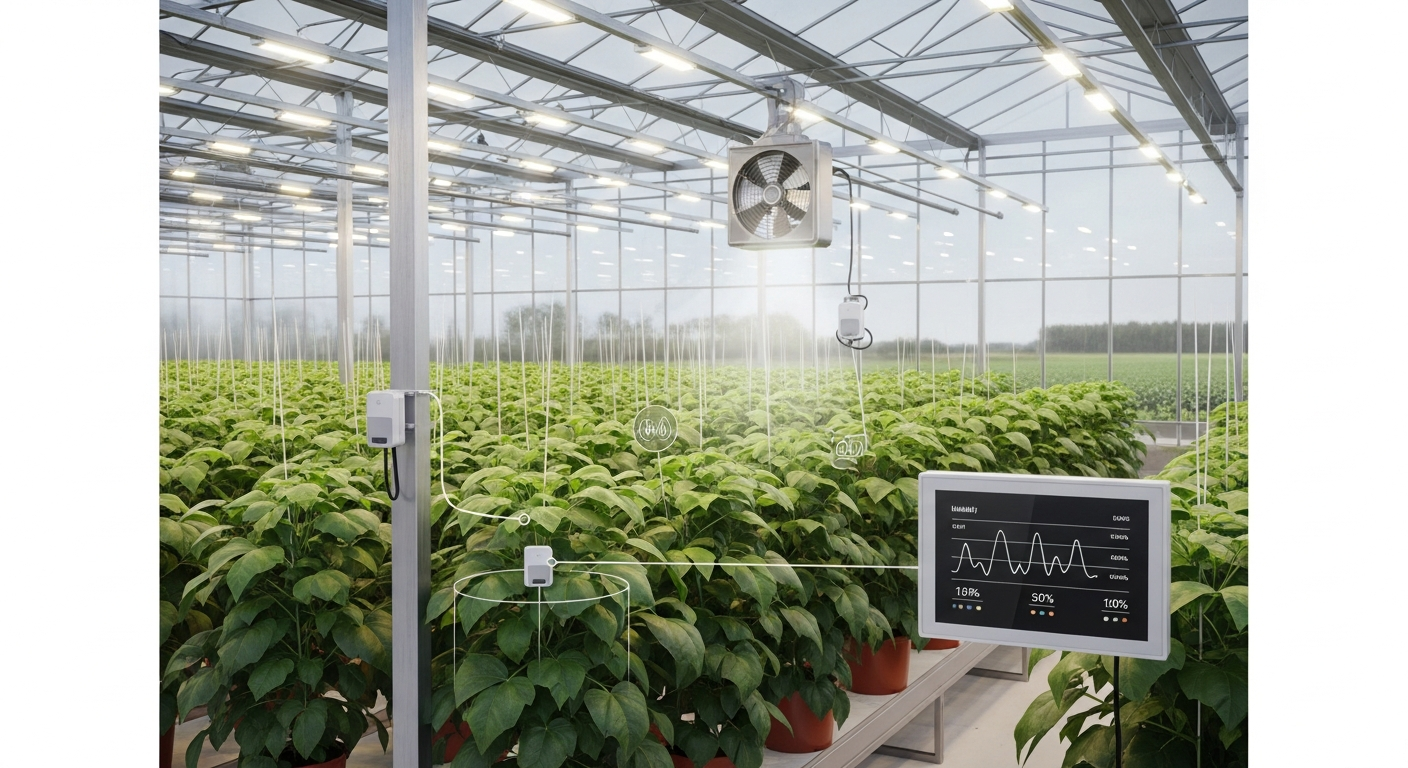
Strategic sensor placement isn’t about guesswork; it’s about thoughtful consideration of airflow, plant characteristics, and potential environmental anomalies. The goal is to obtain data that truly represents the conditions your plants are experiencing.
Avoid Microclimates and Anomalies
The most common mistake in sensor placement is situating them in microclimates – small, localized areas within the greenhouse that have significantly different conditions than the general environment. These spots will give you misleading data. Always avoid:
- Direct Sunlight: Sunlight can heat the sensor itself, causing it to read a lower relative humidity than the surrounding air. Always place sensors in shade or use a radiation shield.
- Near Vents, Fans, or Heaters/Coolers: Air directly exiting these systems will have an artificially high or low humidity. Wait for the air to mix and stabilize.
- Directly Above Water Sources: Misting lines, irrigation emitters, or even standing water can create localized zones of extremely high humidity that don’t reflect the overall canopy conditions.
- Against Walls or Floors: These surfaces can absorb and radiate heat or moisture differently than the open air, creating localized humidity pockets.
- Too Close to Transpiring Plants: While you want to monitor canopy conditions, placing a sensor directly within a dense cluster of actively transpiring leaves can give a localized high reading, especially if airflow is poor in that specific spot.
Representative Zones: Where to Place Them
The aim is to measure the air that your plants are actually interacting with. Here’s how to achieve that:
- Canopy Level: Position sensors at the height of your plant canopy. As plants grow, adjust the sensor height to always be within or just above the densest part of the foliage. This is where transpiration and disease pressure are most critical.
- Central Locations: For smaller greenhouses, a single sensor placed centrally, away from walls and equipment, can be sufficient.
- Multiple Zones for Larger Greenhouses: In larger or multi-zone greenhouses, a single sensor is inadequate. Implement multiple sensors distributed across different growing zones or sections. Consider areas near entry points, different crop types, or distinct climate zones within the same structure. This allows you to identify variations and tailor climate control more precisely.
- Good Airflow Areas: Ensure the sensor is in a location with adequate, but not turbulent, airflow. This allows it to accurately sample the ambient air rather than a stagnant pocket.
- Spaced Appropriately: If using multiple sensors, ensure they are spaced far enough apart to capture distinct environmental conditions, typically 15-30 feet apart, depending on greenhouse size and uniformity.
Protection and Maintenance
Even perfectly placed sensors won’t provide accurate data if they aren’t protected and maintained.
- Radiation Shields: Always use a radiation shield to protect sensors from direct sunlight. These shields allow air to flow freely but block solar radiation from directly heating the sensor.
- Splash Guards/Enclosures: If sensors are in areas prone to splashing from irrigation or misting, consider a permeable enclosure that shields from direct water but allows air exchange.
- Regular Cleaning: Periodically inspect and gently clean sensors according to manufacturer instructions. A soft brush or compressed air can remove dust and debris.
- Calibration: Humidity sensors drift over time. Calibrate them regularly (e.g., quarterly or annually) using a known reference standard or by sending them to a specialized lab. This ensures ongoing accuracy.
- Data Verification: Cross-reference sensor data with visual observations of your plants. If the data suggests optimal conditions but your plants show signs of stress (e.g., wilting or mildew), it’s a red flag to investigate sensor accuracy or placement.
Beyond Basic Placement: Advanced Considerations
For those looking to truly optimize their greenhouse environment, integrating sensor data into a broader management strategy is key.
Data Logging and Trend Analysis
Modern greenhouse management systems don’t just display current readings; they log data over time. This historical data is invaluable. By analyzing trends, you can identify patterns, understand how your climate control systems respond, and diagnose recurring issues. For example, if you consistently see humidity spikes after irrigation, you might need to adjust ventilation or watering schedules.
Integrating with Climate Control Systems
The most advanced greenhouses link their humidity sensors directly to automated climate control systems. Accurate sensor data feeds into these systems, allowing for proactive adjustments to ventilation, fan speeds, heating, and fogging systems to maintain ideal humidity levels automatically. This significantly reduces manual labor and ensures a more stable, optimal growing environment around the clock.
Redundancy and Averaging
For critical crops or very large greenhouses, consider employing redundancy. This means using two or more sensors in close proximity within a key growing zone. By averaging their readings, you can mitigate the impact of a single faulty sensor or temporary localized anomaly, providing a more robust and reliable data point for your climate control decisions.
Mastering humidity control in your greenhouse starts with impeccable data, and impeccable data starts with strategic sensor placement. By understanding the ‘why’ behind accurate measurements, recognizing sensor limitations, and meticulously applying the principles of optimal placement, protection, and maintenance, you equip yourself with the insights needed to cultivate healthier plants and maximize your yields. Invest the time in perfecting your sensor network, and your greenhouse will reward you with thriving crops and fewer environmental headaches. Happy growing!