As the vibrant greens of summer give way to the crisp chill of autumn, the focus in your greenhouse naturally shifts from cooling to heating. But before you fully embrace the warmth of your supplemental heaters, there’s a crucial task that often gets overlooked: proper winterization of your greenhouse cooling system. Neglecting this vital step can lead to costly repairs, reduced efficiency, and even complete system failure when spring arrives. This comprehensive guide from Greenhouse Climates will walk you through the best practices for safeguarding your cooling infrastructure, ensuring it weathers the winter gracefully and is ready to spring back to life next season.
Why Winterize Your Greenhouse Cooling System?
You might think simply turning off your cooling system is enough, but there are several compelling reasons why a thorough winterization process is indispensable for any serious greenhouse enthusiast.
- Prevent Freeze Damage: The most immediate and destructive threat. Water left in pipes, pumps, and evaporative pads will expand when it freezes, leading to cracked plumbing, damaged pumps, and ruined pads. This can be an expensive fix.
- Extend Equipment Lifespan: Proper cleaning, drying, and storage protect components from corrosion, mineral buildup, and pest damage, significantly extending their operational life.
- Maintain Efficiency: Accumulated dirt, algae, and mineral deposits can hinder performance. A clean system runs more efficiently and uses less energy when it’s back in action.
- Prevent Algae and Mildew Growth: Stagnant water and damp pads provide ideal breeding grounds for algae and mildew, which can become stubborn problems if left unchecked.
- Avoid Unnecessary Repairs: Identifying and addressing minor issues during winterization can prevent them from escalating into major breakdowns in the busy spring season.
Step-by-Step Guide to Winterizing Your Evaporative Cooling Pads and Pump System
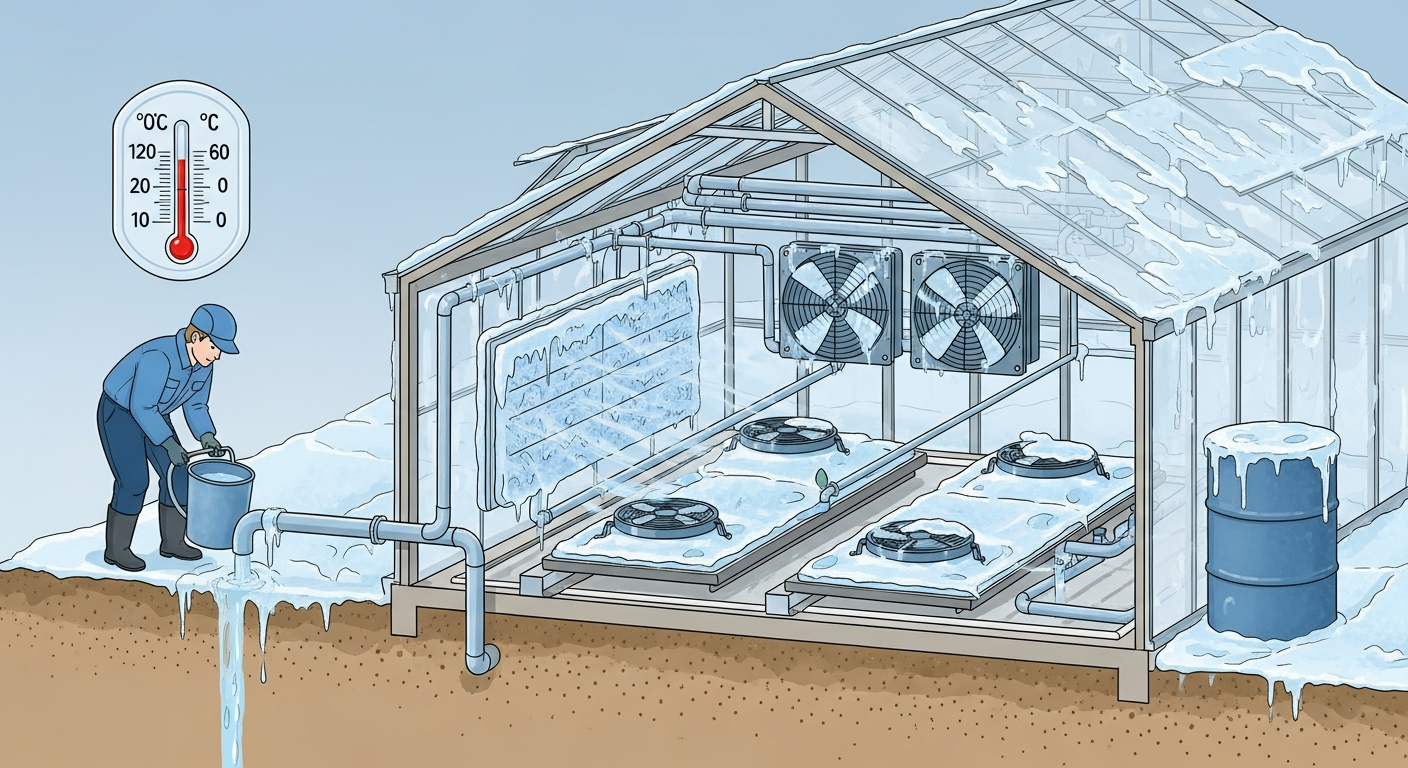
Evaporative cooling systems, often featuring “pad and fan” setups, are highly effective but require careful attention during winterization due to their reliance on water.
1. Drain and Clean the Water System
- Disconnect Power: Safety first! Always ensure the power supply to your pump and cooling system is completely disconnected before you begin any work.
- Drain Reservoirs and Sumps: Completely drain all water from the main reservoir, collection troughs, and any sumps. Open drain valves at the lowest points of your plumbing system to ensure all water exits.
- Flush Lines: If possible, flush the plumbing lines with fresh water to remove any lingering sediment, algae, or mineral deposits. Consider using an air compressor to blow out any remaining water, especially from horizontal runs or low spots where water might pool.
- Clean Components: Use a stiff brush and a mild, greenhouse-safe cleaning solution (or a diluted vinegar solution for mineral buildup) to scrub down reservoirs, troughs, and any accessible internal surfaces. Rinse thoroughly.
2. Remove and Store Cooling Pads
- Gently Remove Pads: Carefully slide out your evaporative cooling pads. These are often fragile when wet or dry, so handle them with care to avoid damage.
- Clean the Pads: Gently rinse the pads with a hose to remove any loose debris, dust, or light algae. For stubborn mineral deposits, some recommend a very dilute acid solution (like vinegar), but always check the manufacturer’s recommendations. Avoid high-pressure washing as it can damage the pad structure.
- Dry Thoroughly: This is critical. Lay the pads flat or stand them on edge in a well-ventilated area to dry completely. Any moisture left in the pads can lead to mildew, rot, or freezing damage.
- Store Safely: Once bone dry, stack the pads neatly and store them in a clean, dry, dark, and pest-free location. Covering them with a tarp or plastic sheeting can protect them from dust and rodents.
3. Protect the Pump
- Disconnect and Remove: Disconnect the pump from the plumbing and electrical supply.
- Clean the Pump: Inspect the impeller for debris and clean it. Remove any mineral buildup.
- Store in a Frost-Free Location: The pump is susceptible to freeze damage. Store it indoors in a heated space, like a shed, garage, or even your basement, for the winter.
Protecting Your Ventilation Fans and Louvers
While not directly water-based, your ventilation fans and automatic louvers are integral to your cooling system and require winter attention.
- Clean Fan Blades and Housings: Over a season, fan blades can accumulate a surprising amount of dust, dirt, and insect residue. Use a damp cloth to wipe down blades and the fan housing. This improves efficiency and reduces strain on the motor.
- Inspect Motors and Belts: If your fans are belt-driven, check the belts for cracks, fraying, or excessive wear. Replace them if necessary. For motors with grease fittings, follow manufacturer guidelines for lubrication.
- Seal Louvers and Vents: Ensure that all automated louvers and manual vents close completely and securely. Check the gaskets or weatherstripping around them for wear or damage. Cold drafts entering through leaky vents can drastically increase your heating costs. Consider adding temporary insulation panels or covers over large fan openings and vents during extreme cold periods to create an additional thermal barrier.
- Check Electrical Connections: Inspect all electrical wiring and connections for any signs of corrosion, fraying, or loose contacts. Address these issues to prevent electrical problems.
Don’t Forget the Automation and Controls
Modern greenhouses often rely on sophisticated controllers to manage climate. Don’t overlook these components during winterization.
- Review Control Settings: Ensure your climate control system is set appropriately for winter. This usually means disabling cooling functions and prioritizing heating.
- Clean Sensors: Temperature and humidity sensors can become covered in dust or residue, affecting their accuracy. Gently clean them according to manufacturer instructions.
- Store Sensitive Components: If your system includes portable or highly sensitive sensors, consider storing them indoors to protect them from extreme cold and dampness.
- Check Battery Backups: If your controller has a battery backup, test it and replace batteries if needed to ensure settings are retained during power outages.
Beyond the Basics: Shade Cloth and Supplemental Cooling
Other elements that contribute to your greenhouse’s cooling strategy also need attention.
- Clean and Store Shade Cloth: If you use external shade cloth, remove it, clean off any dust, leaves, or bird droppings, and allow it to dry completely. Fold it neatly and store it in a dry, dark place to prevent degradation from UV light and pest damage.
- Portable Coolers: For standalone evaporative coolers or misting fans, drain them completely, clean thoroughly, and store them indoors in a dry, frost-free environment.
- Misting/Fogging Systems: Ensure all water lines for misting or fogging systems are completely drained to prevent freeze damage.
Conclusion
Winterizing your greenhouse cooling system isn’t just about preventing damage; it’s about investing in the longevity, efficiency, and peak performance of your entire greenhouse operation. By dedicating a bit of time now to properly clean, drain, and store your equipment, you’ll save yourself significant headaches and expenses come spring. When those first warm days arrive, your greenhouse cooling system will be ready to kick into action without a hitch, allowing you to focus on what you love most: cultivating a thriving environment for your plants. Proactive maintenance is the cornerstone of a successful and sustainable greenhouse.