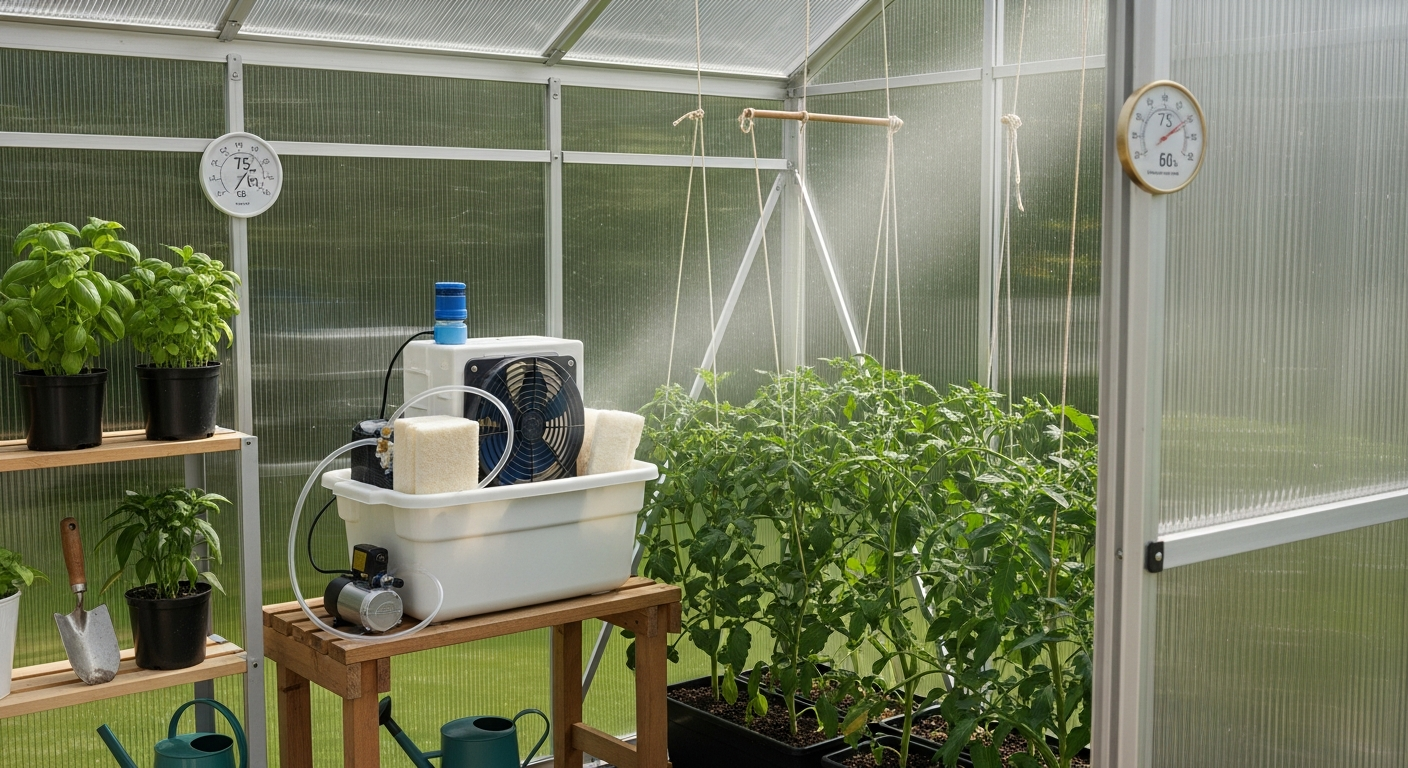
The summer sun, while essential for growth, can quickly turn a cherished hobby greenhouse into an unbearable oven. High temperatures stress plants, leading to wilting, stunted growth, and even death. While commercial cooling systems can be expensive and power-hungry, there’s a tried-and-true, energy-efficient method perfect for the DIY enthusiast: the evaporative cooler, often called a swamp cooler. This ingenious device uses the simple principle of evaporation to significantly drop ambient temperatures, providing a comfortable environment for your precious plants without breaking the bank. If you’re looking for a cost-effective and rewarding solution to beat the heat in your greenhouse, building your own swamp cooler is an excellent project.
Why a DIY Swamp Cooler is Your Greenhouse’s Best Friend
Before diving into the construction, it’s helpful to understand why an evaporative cooler is such an effective and popular choice for hobby greenhouses, especially in certain climates.
The Science of Evaporative Cooling
An evaporative cooler works by drawing warm, dry air over water-soaked pads. As water evaporates from the pads, it absorbs heat from the air, causing the air temperature to drop significantly. This cooled, humidified air is then circulated into your greenhouse. It’s the same principle that makes you feel cooler after stepping out of a shower or when a breeze blows across your sweaty skin.
Benefits for Your Hobby Greenhouse
- Cost-Effective: DIY swamp coolers are significantly cheaper to build and operate than traditional air conditioning units. They use far less electricity, primarily powering a small pump and a fan.
- Energy-Efficient: By relying on the natural process of evaporation, these coolers consume a fraction of the energy of compressor-based AC systems, leading to lower utility bills.
- Adds Humidity: Many greenhouse plants, especially tropical varieties, thrive in higher humidity. A swamp cooler naturally adds moisture to the air, which can be beneficial in dry environments.
- Fresh Air Circulation: Unlike recirculating air conditioners, evaporative coolers continuously draw in fresh outside air, cool it, and push stale, hot air out, ensuring good air exchange and ventilation.
- Simple Design & Maintenance: The components are readily available, and the design is straightforward, making it an accessible project for most DIYers. Maintenance primarily involves cleaning and replacing pads.
When a Swamp Cooler Shines (and When it Doesn’t)
It’s crucial to note that evaporative coolers perform best in dry climates. The drier the air, the more water can evaporate, and the more significant the cooling effect. In regions with high humidity (e.g., the southeastern US or tropical areas), the air is already saturated with moisture. In such conditions, a swamp cooler will add more humidity without providing much cooling, potentially creating a muggy, uncomfortable environment that can encourage fungal diseases. Always consider your local climate before investing time in this project. If you’re in a humid region, traditional ventilation with shade cloth and exhaust fans might be a more effective strategy.
Essential Components for Your DIY Swamp Cooler
Gathering your materials before you begin will make the construction process much smoother. Most of these items can be found at a local hardware store, garden center, or online.
The Core Materials
- Plastic Storage Tote or Large Container: This will serve as your cooler’s main housing and water reservoir. Choose one with a lid, ideally 15-20 gallons or larger, depending on your greenhouse size and desired cooling capacity.
- Small Submersible Water Pump: Look for a pump rated for continuous use, capable of pumping water to a height of about 1-2 feet, with a flow rate of 100-200 GPH (gallons per hour).
- Cooling Pads (Evaporative Media):
- Aspen Pads: Economical and widely available, often used for pet bedding or packing. They are effective but may require more frequent replacement due to breakdown.
- Cellulose Pads (Rigid Media): More durable and efficient, designed specifically for evaporative coolers. These are more expensive but last longer and provide better cooling. Choose pads that can be cut to fit your container’s openings.
- Small Fan: A small box fan, an old computer fan (for very small greenhouses), or a repurposed exhaust fan can work. The fan’s job is to pull air through the wet pads.
- PVC Pipe (1/2″ or 3/4″): A few feet for creating a water distribution manifold above the pads.
- PVC Fittings: T-connectors, elbows, and end caps to build your manifold.
- Flexible Vinyl Tubing (matching pump outlet size): To connect the pump to your PVC manifold.
Tools and Sundries
- Drill and Various Drill Bits: For making holes for the fan, pads, and water distribution.
- Utility Knife or Jigsaw: For cutting openings in the plastic tote.
- Measuring Tape and Marker: For accurate marking.
- Silicone Sealant or Waterproof Caulk: To seal around the fan and pad openings.
- Zip Ties, Bungee Cords, or Small Bolts/Nuts: For securing the fan and pads.
- Wire Cutters and Electrical Tape (if wiring): For fan connections.
Step-by-Step Construction Guide for Your DIY Swamp Cooler
Building your own swamp cooler is a satisfying project that typically takes an afternoon. Follow these steps carefully for the best results.
1. Prepare the Container: Creating Openings
- Fan Opening: On one side of your plastic tote, measure and cut an opening slightly smaller than your fan’s dimensions. This will be where air is pulled out of the cooler and into the greenhouse. Ensure the fan can fit snugly.
- Pad Openings: On the opposite side, or two adjacent sides (depending on your design and pad size), cut one or more rectangular openings for your cooling pads. The total area of these openings should ideally be slightly larger than your fan’s intake area to allow for good airflow.
- Drainage/Overflow (Optional but Recommended): Drill a small hole near the top edge of the reservoir, but below the lid line, to act as an overflow drain. This prevents accidental flooding.
2. Build the Water Distribution Manifold
- Assemble PVC: Using your PVC pipe and fittings, create a rectangular or T-shaped manifold that will sit horizontally above your cooling pads inside the container. This manifold needs to be long enough to span the length of your pad openings.
- Drill Emitter Holes: Drill small holes (1/16″ to 1/8″) along the underside of the PVC manifold, spaced evenly (every 2-3 inches). These holes will allow water to drip down and saturate the cooling pads.
- Cap Ends: Cap off the ends of the manifold with PVC end caps.
3. Install the Cooling Pads
Cut your cooling pads to fit snugly into their respective openings. If using aspen pads, layer them a few inches thick. If using rigid cellulose, cut precisely. Secure them in place. You might need to build a simple frame out of PVC or wood to hold them firmly against the container, or use zip ties through drilled holes in the tote.
4. Set Up the Water System
- Place Pump: Position the submersible pump at the bottom of the plastic tote.
- Connect Tubing: Attach one end of your flexible vinyl tubing to the pump’s outlet and the other end to a hole drilled in your PVC manifold. Ensure a tight, secure connection.
5. Mount the Fan
Place your fan over its designated opening on the tote. Ensure it’s oriented to pull air *into* the cooler, through the wet pads, and then push it out into the greenhouse. Secure the fan using zip ties, bolts, or by sealing it in place with silicone sealant around the edges to prevent air leaks.
6. Final Assembly and Testing
- Seal Everything: Use silicone sealant around all openings (fan and pads) to ensure an airtight seal, preventing air from bypassing the wet pads.
- Fill with Water: Fill the bottom of your tote with water, ensuring the pump is fully submerged.
- Plug It In: Plug in the pump and the fan. Observe the water flow over the pads. Adjust the manifold or pump if the pads aren’t getting evenly saturated. Check for any leaks.
- Add a Lid: Place the lid on the tote to reduce water evaporation from the reservoir and to keep debris out. You might need to cut a small notch for power cords.
Optimizing Your DIY Swamp Cooler’s Performance
Once your DIY swamp cooler is operational, a few considerations will help maximize its effectiveness and ensure longevity.
Strategic Placement
Place your swamp cooler at one end of your greenhouse, positioned to blow cooled air down the length of the structure. Ensure there’s adequate space around the pad intake for ambient air to be drawn in. Conversely, you’ll need exhaust vents or open windows at the opposite end of the greenhouse to allow the hot, humid air to escape. Without proper exhaust, the greenhouse will quickly become saturated with humidity, negating the cooling effect.
Regular Maintenance is Key
- Keep Water Clean: Algae and mineral buildup can clog the pump and pads. Regularly drain and clean the reservoir, and refill with fresh water. You might consider adding a few drops of algaecide (safe for plants) if algae growth is an issue.
- Clean or Replace Pads: Over time, cooling pads will accumulate dust, minerals, and debris, reducing their efficiency. Clean aspen pads regularly by rinsing them. Rigid cellulose pads can also be rinsed, but if they become excessively clogged or start to smell, they should be replaced. The frequency depends on water quality and usage, but typically once a season for aspen, every 1-3 years for cellulose.
- Check Pump and Tubing: Periodically inspect the submersible pump for clogs and ensure the tubing is clear and free of kinks.
Adjustments for Optimal Cooling
- Fan Speed: If your fan has multiple settings, experiment to find the optimal balance between airflow and noise. Too slow, and cooling is minimal; too fast, and water might be pulled off the pads too quickly.
- Water Flow: Ensure the pads are consistently wet but not flooded. If water is splashing out, adjust the pump’s flow rate (if adjustable) or the size/number of holes in your PVC manifold.
- Supplemental Ventilation: Remember that a swamp cooler introduces humidity. If your greenhouse becomes too humid, even in dry climates, increase the exhaust ventilation to draw out the saturated air more quickly.
Safety First
Always ensure all electrical components (pump and fan) are rated for outdoor or damp environments and are plugged into GFCI (Ground Fault Circuit Interrupter) protected outlets to prevent electrical shock hazards. Keep cords tidy and out of water pathways.
Conclusion
Creating a DIY swamp cooler for your hobby greenhouse is a rewarding project that offers a practical, energy-efficient solution to summer heat stress. By leveraging the simple power of evaporation, you can create a cooler, more plant-friendly environment without the high costs and energy consumption of traditional air conditioning. Remember to assess your climate, gather your materials, follow the construction steps carefully, and commit to regular maintenance. With a little effort, your plants will thrive, and you’ll enjoy the satisfaction of having built a clever cooling system with your own hands. Happy growing!